 Underwater-Photoshop :: Advanced :: Balanced Exposure :: Zoom Filter Underwater-Photoshop :: Advanced :: Balanced Exposure :: Zoom Filter
Zoom Filter
|

|
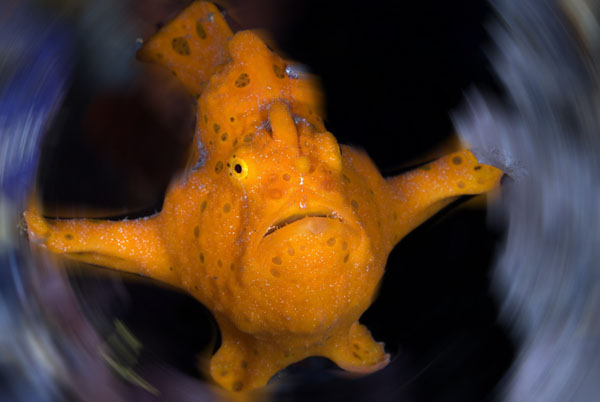
One filter that does work for u/w subjects is the Radial Blur (zoom) filter.

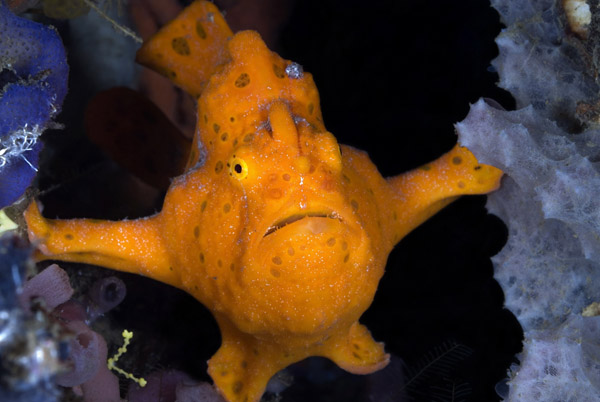
The first thing you do is start with a photo of a Frogfish. Nice enough already, lets give it some Pop!

 The best (non-destructive) way to apply any filter is to create
a smart object (or run a smart filter) and then
maskmasks can be attached to layers to protect areas from editing changes. Masks can be saved as alpha channels.
the filter.
 Hold the space bar to reposition the selection as you are drawing it.
Now, it's important to feather the selection. If you don't the effect will be too
harsh and obvious. The feather creates a soft edge and a smooth transition to the
blurred areas.
Choose Select Modify Modify Feather
(Photoshop CS3 and CS4 - before that it was Select Feather
(Photoshop CS3 and CS4 - before that it was Select Feather). Feather).
Depending on the resolution you will change the size of the feather.
Right now you have a selection around the
center
of the image. We want to select everything BUT the
center.
Choose Select Inverse or Inverse or
 shortcut Ctrl-Shift-I (Cmd-Shift-I on
 Mac)
Mac)
You should see the
selectiona selected area that allows editing changes. Areas outside a selection are protected. Hold Shift to add Option to subtract Ctrl + D to deselect and Ctrl + I to invert
go around the edge of your page now. This is where the effect happens.
Choose Filter Blur Blur Radial
Blur Radial
Blur
Choose Zoom as the method
Select Good for quality (Best takes forever with little improvement in quality)
Choose your amount to suit. For a heavier blur use 100. You might have to test it
and undo a few times to get exactly what looks best on your image.
And here we have the final result. Changing the feather and the blur amount will
change the effect. Experiment with different shaped selections and different amounts
of blur. In some cases you may want to apply the blur more than once.


Next >> Emphasise Subject
Psssst! Have you seen our U/W Photo course yet? It's the best course to learn underwater photography the easy way online.
|