 Underwater-Photoshop :: Adjustments :: The Adjustment Palette Underwater-Photoshop :: Adjustments :: The Adjustment Palette
The Adjustment Palette
|

|
 Getting the most out of your images by making adjustments is one of the most crucial
aspects of digital image management. You may spend much more time refining images
than you actually do editing them in Photoshop.
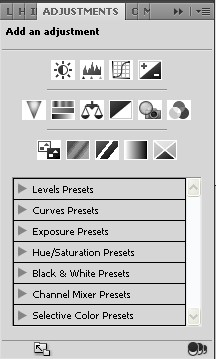
The adjustment
paletteA special dialog with a specialised editing purpose. By default palettes appear screen right. They can be stacked with others palettes and docked. Choose the palette name in the Window menu to open it. To show or hide all palettes press shortcut Shift + Tab.
is a palette that groups together all the adjustment tools i.e. brightness, contrast,
curves, levels etc. in one place. There are also a number of pre-sets that
you might find useful.
When you make an adjustment with one of these tools you will find that suddenly a new layer has
been created. This layer initially contain no pixels, but can be painted on like information
describing how we would like to adjust pixels in the image.
Adjustment layers are very useful to create some effects, rather like we have done
in previous versions of Photoshop using the history brush.


Next >> Photoshop
Psssst! Have you seen our U/W Photo course yet? It's the best course to learn underwater photography the easy way online.
|