Wreck Photography
Wrecks are magical places and the essence of wreck
photography is to capture that magic. Wreck photography does therefore require a
'feel' for the subject.
Take your average wreck diving fanatic. You see their
eyes light up when they talk about their favourite wreck. They can even get
excited about the way a wreck is lying! This is the sort of devotion you need
for good wreck photography, only as a photographer you are trying to prise away
a photograph, not a porthole!
 You don't need to be an experienced wreck diver to
photograph wrecks. Wrecks make excellent wide-angle subjects for beginners - not
least because they stand still! Wrecks don't even need to be boats. Submarines,
aeroplanes and even sunken cars require the same treatment! Even if you prefer
natural history subjects, wrecks should not be ignored, as they attract a myriad
of marine creatures.
 A wide-angle lens is
best for wreck photography. You can concentrate on one feature if the viz is
poor, or pull back to get the whole wreck in shot if conditions allow. A wide-angle lens is
best for wreck photography. You can concentrate on one feature if the viz is
poor, or pull back to get the whole wreck in shot if conditions allow.
Wreck Photography Strategy
The orientation of a wreck will determine the best
angles to shoot from. Wrecks that are upside down are the hardest to work with.
They can be featureless but, if the prevailing visibility is greater, or equal
to, half its length you can get a side on view of the whole vessel if you have a
lens of sufficiently wide angle. There are also closer shots to be had at either
end (your buddy and the prop or down low shooting up at the bows for
example).
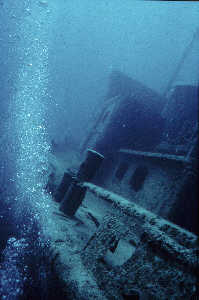
More usually a wreck will be lying at an angle and this
can be a handicap. Quite often a photograph of a wreck lying on its' side will
work when viewed rotated as if it were the right way up - providing there is
nothing in shot to betray which way is up, such as divers' bubbles.
Wrecks that are upright, intact, and in visibility to
appreciate them are easy to work with, but unfortunately rare! Intact wrecks are
also usually deep so you can't waste bottom time, You must head straight for the
photographic hotspots: the bridge, engine room, or prop for instance.
Given the luxury of a few dives on the same site you
should begin to capture the character of a wreck. All wrecks have a story to
tell and any historical angle should always be explored. Military wrecks are
often steeped in history.
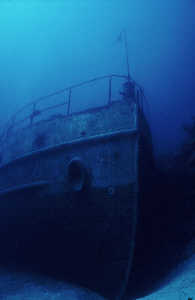
You must resort to formula shots if you don't have the
benefit of a few dives on the same wreck e.g. inside looking out, down low
shooting up at the bows, or up against machinery for example.
Wrecks are the only underwater subjects to have a
straight lines. This means you can look for, and exploit, strong compositional
devices such as converging lines and diagonals. Repetitive features, receding
into the distance can be included to add depth.
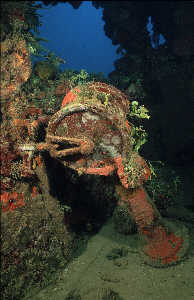
Placing familiar objects out of context, by illustrating
the way that the sea has tamed these manmade structures with marine growth,
gives foreground interest.
Wreck shots don't always require a diver in frame in
order to 'resolve' them, but the relationship of the diver to a wreck is a
popular theme, and the inclusion of a diver does give a sense of scale.
Wrecks are the one of the few underwater subjects that work from a
camera position which is above and looking down. This is probably because a ship
is a familiar object to see from a 'Bird's eye view; or perhaps because such a
shot suggests the start of dive and the anticipation of exploration. Whatever
the explanation, you will probably find yourself in a position to take such a
shot at the beginning and end of a wreck dive and at this time other
photographic opportunities may arise. It is usual for dive boat skippers to put
a shot line onto a wreck for descent/ascent and this provide the opportunity for
shots of divers decompressing to shoot a few
more frames.
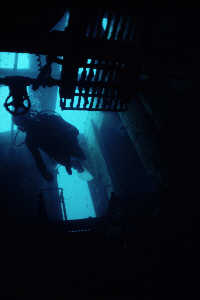
It is very rare that the inclusion of the sun in shot
works with wrecks, usually depth renders it a formless 'blob'. It is often more
pleasing to work with the sun behind you and to aim for a uniform and correctly
exposed background. You can however give the sun more form by hiding it behind
your subject. Silhouettes can work quite well, and such shots often translate
well into Black and White.
 Electronic flash can destroy the mood of a wreck
if you are not careful and you unintentionally overexpose the foreground. On the
other hand it is possible, and extremely effective, to use flash for foreground
fill with balanced light if you get your exposure spot on. Also, by using the
flash well off camera, you can make a feature of lighting and, by varying the
angle of the light source (and therefore the shadows), you can cause the
wreckage to appear to change shape . Electronic flash can destroy the mood of a wreck
if you are not careful and you unintentionally overexpose the foreground. On the
other hand it is possible, and extremely effective, to use flash for foreground
fill with balanced light if you get your exposure spot on. Also, by using the
flash well off camera, you can make a feature of lighting and, by varying the
angle of the light source (and therefore the shadows), you can cause the
wreckage to appear to change shape .
Equipment for Wreck Photography
The first technical decision to make shooting wrecks is ISO setting. Choosing a
high setting (e.g. 1,000 ASA or higher allows you to shoot in lower light
but can be grainy when
enlarged) or choosing a slower setting (which gives better
quality but require longer exposure times). It depends on available light which,
in turn, depends on depth.
Long exposures that would be unacceptable with moving
subjects because they would result in blurred images can be very successful on
inanimate objects such as wrecks. The usual approach is to select automatic
exposure mode with an aperture in the middle of the lens' range and, with
yourself and the camera braced hard against some convenient wreckage (or on a
tripod), you can record detail that can't even be seen with the naked eye.
A full frame fisheye lens, covering 180 degrees, is
ideal for long exposures and gives excellent results despite distortion of
straight lines.
Smaller apertures and subsequent improvement in depth of
field can also be achieved with longer exposures but don't expect this technique
increase visibility to match though!
Interior wreck shots can also be made on time exposures
but more often require a lighting strategy based on flash photography. However,
you must not ignore natural light exposure when doing an 'inside out' shot.
The difficulty with using flash as the main light source
in wrecks is in getting an even lighting. There is nothing worse than
overexposing an object close to the flash. Given that the effective range of any
flash underwater is limited to less than two metres, it is impossible to evenly
illuminate the interior of all but the smallest cabins.
Flash coverage must obviously match the angle of view of
the lens; otherwise you get a very unattractive 'pool of light' effect.
Unfortunately your flash must be considered a point source due to its size in
relation to the subject it is illuminating. This results in a 'hard' light with
clearly defined shadows.
Due to the short duration of flash it is hard to predict
the 'shape' of flash coverage. Ugly shadows may appear which you didn't
anticipate. To counteract this the light source needs to be as large as
possible, either by diffusing or bouncing off a reflector. This is usually
impractical but the light source can be pulled slightly behind the camera to
improve coverage.
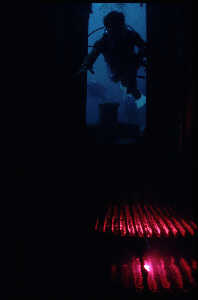
Slave strobes (flashes triggered remotely by the main
flash) will fire consistently in enclosed, darkened spaces such as wreck
interiors. They can be lodged in some most unusual places!
Silt is a problem on all wrecks, inside and out, and is
especially prevalent on wrecks in harbours. The trick is to make a conscious
attempt to sort your buoyancy out before you enter. Care should be exercised
when working in confined areas. After a group of sports divers have 'explored' a
wreck, clouds of disturbed silt, and air bleeding out from lower decks, will
frustrate your efforts to get a good, clean shot; so make sure you are first
down the shotline.
When you know you have a limited bottom time you should
research the wreck to pinpoint likely subjects.
 finally, a word
about safety. All dives with no clear surface, such as cave and wreck
penetration, require training and planning; if you haven't got it, don't do it,
especially with the added handicap of a camera - the best shots are nearly
always close inside or just outside wrecks anyway. Also, any wreck lying in the
wrong orientation will have objects that are hanging which shouldn't be - make
sure you're not underneath them when they decide to fall! finally, a word
about safety. All dives with no clear surface, such as cave and wreck
penetration, require training and planning; if you haven't got it, don't do it,
especially with the added handicap of a camera - the best shots are nearly
always close inside or just outside wrecks anyway. Also, any wreck lying in the
wrong orientation will have objects that are hanging which shouldn't be - make
sure you're not underneath them when they decide to fall!
more: wreck shots submitted by our members to our photo contest
|